2 Camera Interview Setup
For interview and testimony videos, we like to use a two camera setup with a traditional 3-point lighting rig. In this post I will go over how and where we place our cameras, lights and microphone. Wherever we shoot, we use this system, and it works for just about every condition. For simplicity sake, our "virtual" shoot will be a studio setup.

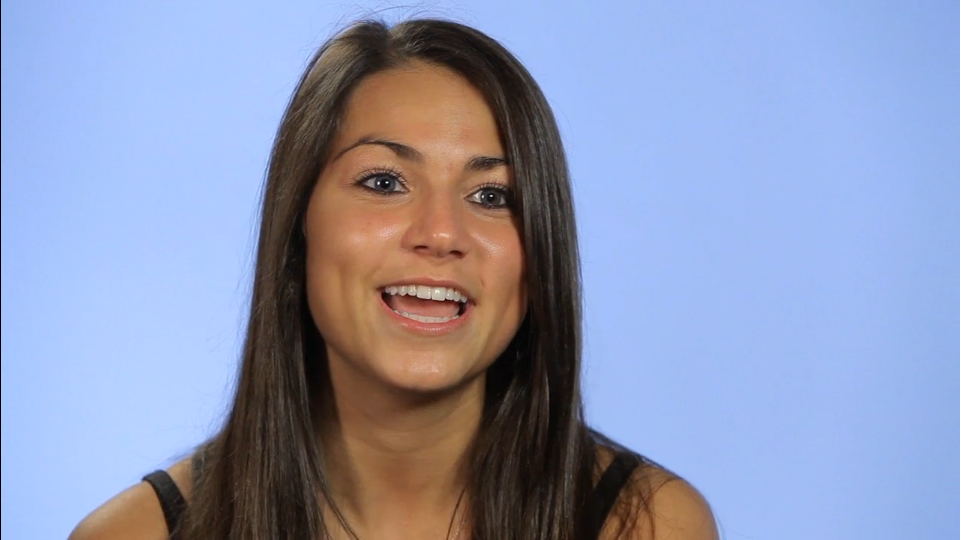
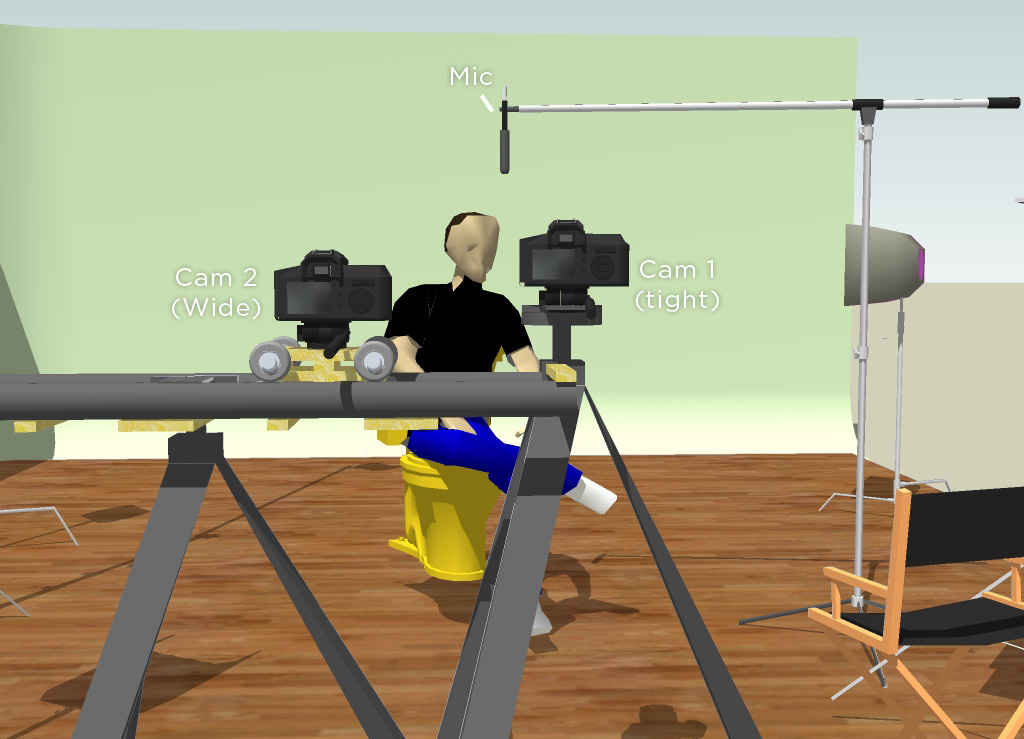
Above is what our typical setup looks like. First lets talk about our camera placement. We always place the two cameras side-by-side. basically as close together as physically possible. The camera closer to the "interviewer" is always our tight camera. This is usually framed up from shoulders up to the head. Here is a screen shot of what this looks like.
Because this Camera (camera 1) is tighter, you will want to place it higher than camera 2. The general rule is the tighter the shot, the more elevated the camera should be. Notice the diagram below:
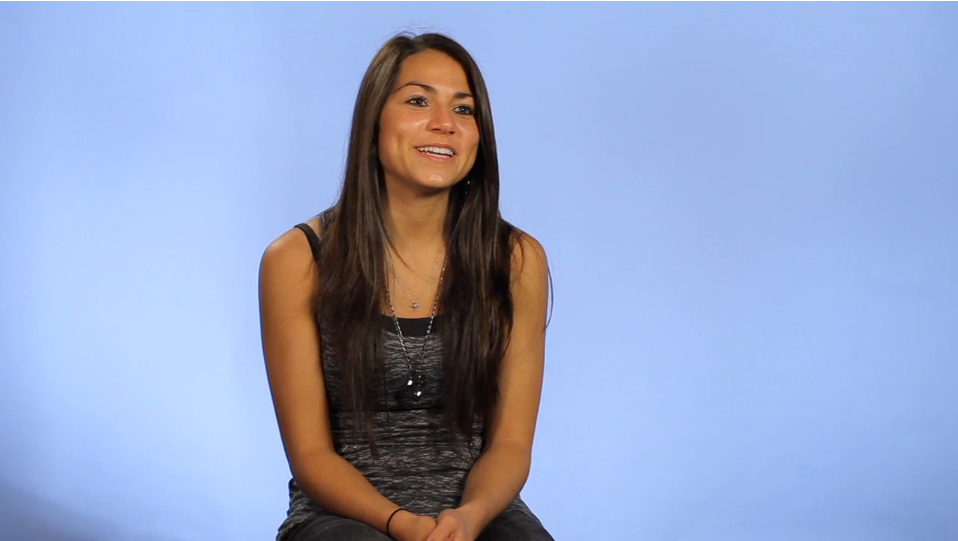
Camera 2 should be about 30-40% wider than Camera 1. This prevents your cuts in the edit looking like jump cuts, which can be jarring and bring unnecessary attention to itself. so that's why if we have say a 85mm lens on the tight camera, you will want to put a 35mm or 50mm on the wider camera. This will give you a look that is something like this:
Now that camera placement is covered, Let's talk about lights. The first and most important light is the "KEYLIGHT" this is your most powerful light source and we always place it coming from the direction that they are looking. (Notice the diagram below).
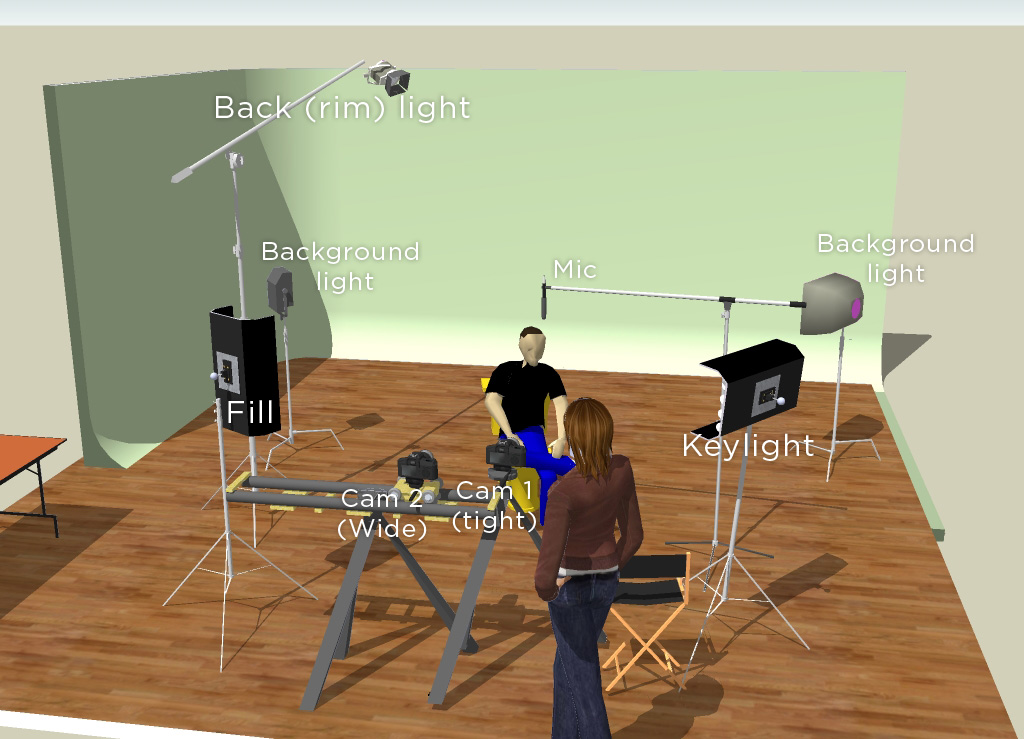
We usually place it on the other side of where the interviewer is sitting or standing. but not too far away, you don't want it to come from the side of the face, but in front of them. This light is most important because it shows the form of there face and makes them pop out from the background. The second light that i set up is the back light or sometimes called the "rim" light. basically this light highlights the other part of the subjects head and shoulders. This light is always placed opposite of where the Key-light is placed. This light is also crucially important because it separates the other half of them from the background. You can really get by with just these two lights, but what you get might be a little dark on one side of their face, and may seem a little too "dramatic". That's why a "Fill" light is added. Appropriately named, this light fills in that dark area of face that is left from the other two lights. This light is considerably less powerful than the key-light. I usually start with about half of what my Key-light is. then add or subtract to my liking. Once these lights are setup and placed, the background is lit. normally using two lights, you can either light it uniformly or increase the output of one and create a gradient or hot-spot.
A microphone is then placed above the subject on a boom stand. We place the mic 8-12" from the mouth of the subject. The closer the mic is to them, the fuller the sound. we place it as absolutely low as we can without getting into our shot. Make sure to have the mic pointing right at their mouth, chest and throat since that is where all the sound is coming from.
That's pretty much it. Make sure to leave comments or questions below.