Highlands Creative

A blog following the creative team of Church of the Highlands.

  • Creative Internships

DaVinci Resolve 12 Tutorial

May 16, 2016 by John David Wright in Color, Video, Post Production

Here at Highlands, we have loved using this program called DaVinci Resolve to color correct all of our footage! It is a very high quality program that is used to color major motion pictures as well as commercial spots and lots of other things. They offer a free version that we used for while and does pretty much everything you need. I did a screen capture of me coloring a shot in one of our weekly news videos. Enjoy!

May 16, 2016 /John David Wright
2015, 2
Color, Video, Post Production
3 Comments

Music for Highlands News

September 09, 2015 by John David Wright in Audio, Beginner, Creative, Post Production, Video

We have been asked a lot recently about where and how we choose music for Highlands News, so I wanted to write a blog post about it! One of the biggest resources for background music for our news has been Hillsong. We play their music all time time in church services, and it also feels really great in the background of our news! On their website, you can buy instrumental versions for most every album they have. Buy the "MP3 Trax" version, and it comes with instrumentals. Here's a couple that we pull from: 

  • Glorious Ruins
  • We Are Young & Free
  • Cornerstone

I've also really loved using two songs off of Taylor Swift's album, Red. There's a legit instrumental version here.

Also, if there's a song that you really think would work well in your news, chances are there is a decent karaoke version on iTunes. Type in the name of the song you are looking for and put the word "karaoke" on the end of your search and start previewing away! We have done this a couple of times with good results. 

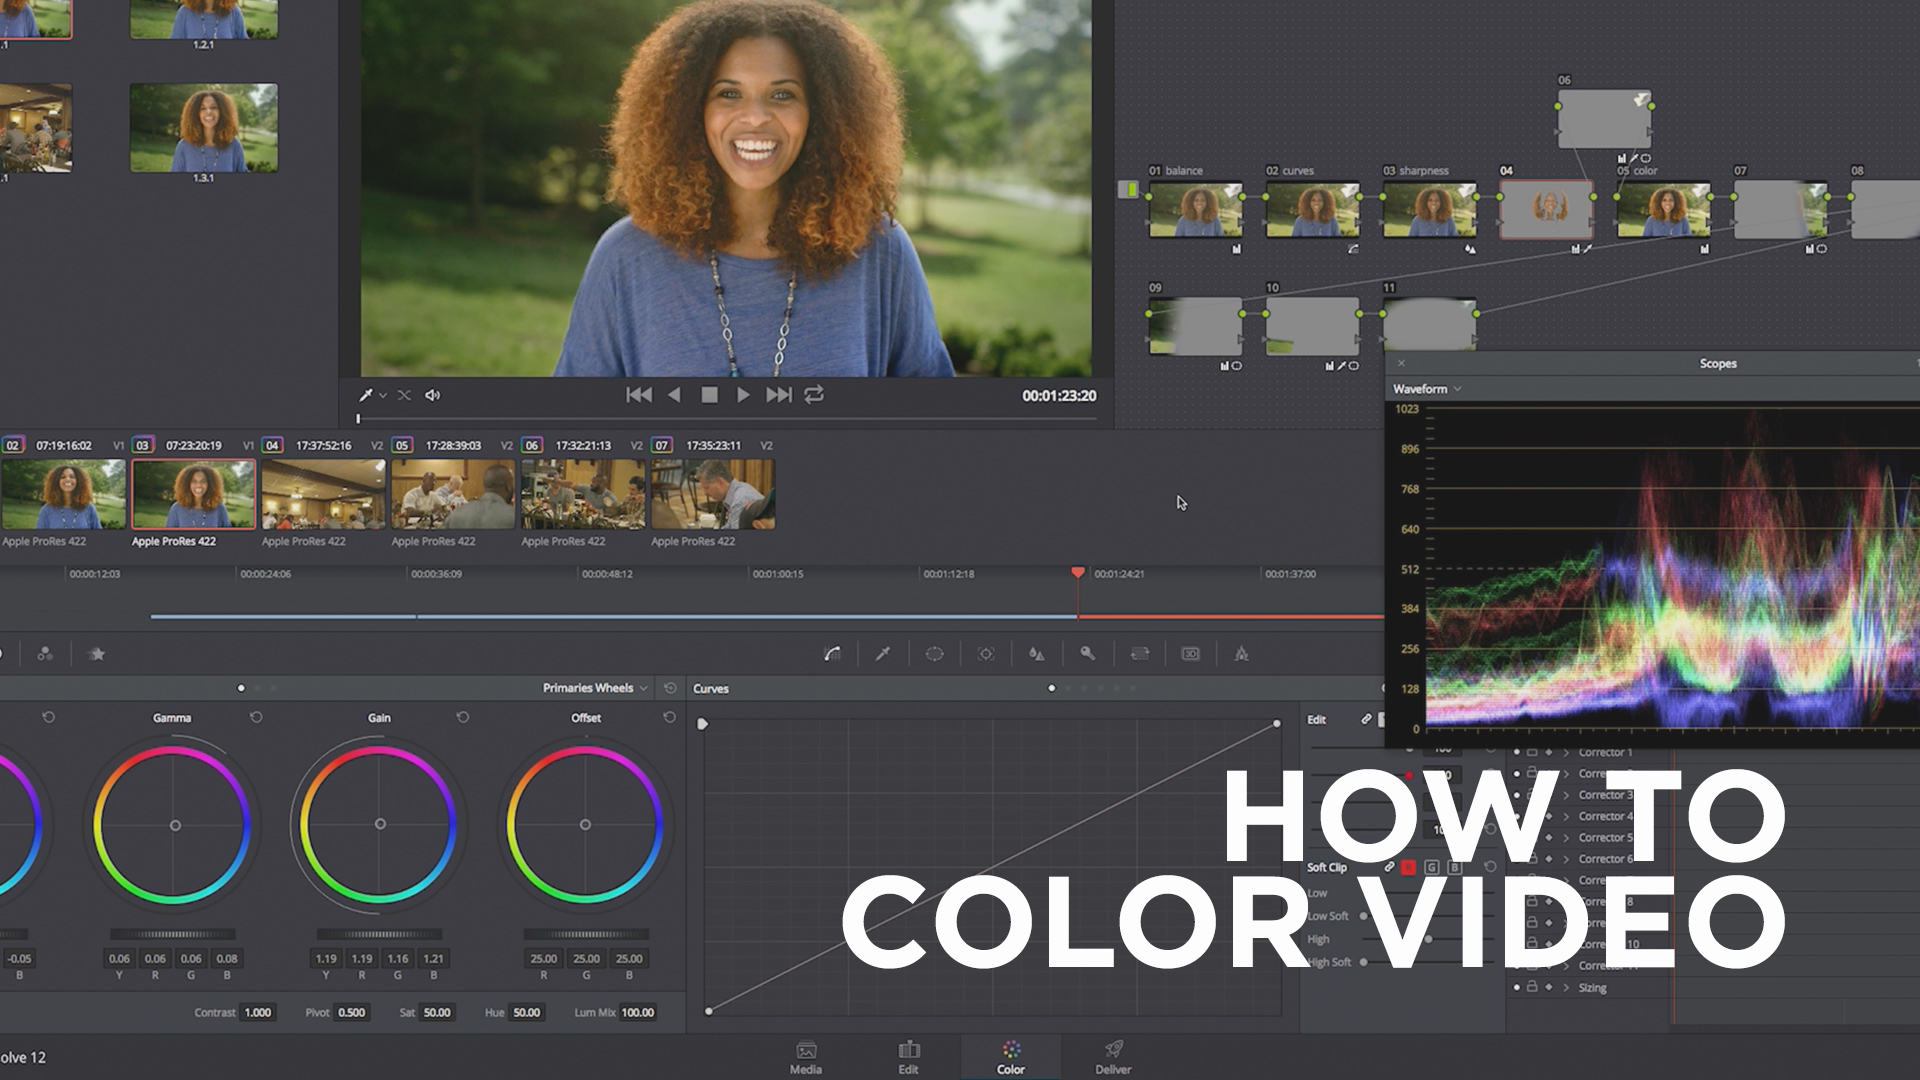
For more info about music for video, check out this blog post.

Hope this helps you and your church! Feel free to ask any questions in the comments section below!

September 09, 2015 /John David Wright
2015, Music, 1
Audio, Beginner, Creative, Post Production, Video
2 Comments

Simple Compositing

June 17, 2015 by Jake Taylor in Beginner, Creative, Post Production, Shooting, Video

Sometimes the shot you want has "stuff" in the way. Maybe you're setting up a testimony and in order to get good boom mic placement you have to sacrifice your wide shot. Or maybe your arms get a little tired and you drop the boom pole into the shot. Or maybe there is a bright "EXIT" sign in the back of the room. There are tons of reasons why your shot could become cluttered and ultimately unusable. But there is a simple fix to all of this and all it requires is a little forethought and a few minutes in After Effects. Take a look at some examples below, sorry they aren't color corrected. 

rach1.jpg
rach2.jpg
tony1.jpg
tony2.jpg
rob1.jpg
rob2.jpg
rach1.jpg rach2.jpg tony1.jpg tony2.jpg rob1.jpg rob2.jpg

As you can see we took a lot out of those images, we removed anything and everything that was distracting to the eye and that didn't add to the overall beauty of the shot. And since the room is a very large room that is hard to haze we even added in some fake light rays.

BUT HOW?

Its easier than you'd imagine. 

1. Plan your shot accordingly. 

When you're setting up your shot make sure nothing you're planning on taking out is "touching" your talent. Don't let an exit sign creep out from behind their head and don't let a chimera or light stand be behind them in your lens. If it's in a corner of the shot or over their head then you're good! Trust me you don't want to find yourself rotoscoping their every move later. You will kick yourself during the edit. But if your subject is one who moves around a lot you may find yourself doing it anyway. 

2. Get a clean plate and don't touch the camera! 

Either before your subject gets into the shot or after you've gotten everything, you need to get a clean shot of the scene without the subject and without the gear. DO NOT TOUCH the camera between filming your subject and getting the plate, even the slightest movement could mess up your shot and hurt you in post. However, if you do shift it a little don't freak out cause you'll still be able to fix it in post but it'll just take longer and be more frustrating. You'll need to get at least 15 seconds if not a minute or two of the clean plate. You need video and not a photo because you want the natural noise of the camera so that it doesn't look jarring on your screen. You're basically going to just duplicate the plate and spread it out over the length of your edit. The plate has nothing in it, its just your scene. No gear, no people. 

Screen Shot 2015-06-10 at 10.51.48 AM.png
Screen Shot 2015-06-10 at 10.51.34 AM.png
Screen Shot 2015-06-10 at 10.51.48 AM.png Screen Shot 2015-06-10 at 10.51.34 AM.png

3. Drop both of them in AE and get to work!

So with the above example it is incredibly easy to fix this in AE. Just drop that clean slate on top and add a simple mask with a little feather. You might also have to play with the brightness because you probably did have lights on in the first shot. 

But, what if your shot is a little more complicated and your slate has an exit sign or a sound booth in it like this:

It's still easy to fix, but you have to spend a little more time on it. There is two different tools to use here. One is the Clone stamp tool, similar to Photoshop's, and the other is replicating part of your scene. What is nice about this is that you don't actually need a clean plate of the scene you can just duplicate your current one. However, I would still get one just in case. 

Clone Stamp: 

Duplicate your footage, and then double click its layer in the timeline panel. You should then be in the "Layer View" which is the second tab of your Preview Window in AE. Make sure your playhead is at the very first frame when you do this. 

From here grab your clone tool, the little stamp in your tools, and play with the brush size until you get exactly what you need. Then alt-click on the part of the footage you want to sample. Release the alt key and then start brushing. Its a good idea to sample several different areas around the area you're removing so that you can get a good mix of the correct colors and it wont look like a smudge on the footage. 

Once you're done click back over to your composition panel, the first tab in the Preview Window, and then ram preview to make sure it looks correct. 

Replication compositing: 

Different than the clone tool but achieves the same result. Duplicate your footage, and then draw a mask around an area in your footage that is similar to the area you're trying to correct.

Screen Shot 2015-06-10 at 11.44.35 AM.png
Screen Shot 2015-06-10 at 11.45.27 AM.png
Screen Shot 2015-06-10 at 11.45.42 AM.png
Screen Shot 2015-06-10 at 11.48.49 AM.png
Screen Shot 2015-06-10 at 11.46.08 AM.png
Screen Shot 2015-06-10 at 11.44.35 AM.png Screen Shot 2015-06-10 at 11.45.27 AM.png Screen Shot 2015-06-10 at 11.45.42 AM.png Screen Shot 2015-06-10 at 11.48.49 AM.png Screen Shot 2015-06-10 at 11.46.08 AM.png

For this example we are wanting to cover the sound booth with a panel that matches the other sound panels on the wall. You can see we actually used another panel and just shifted the position to cover the sound booth. Draw a mask around the area you want to sample and then drag it over and align it. The perspective may be off a bit but you can fix that with a warp or by making the layer 3d and rotating it on the x or y axis. We actually used several other parts of the scene to cover these ugly blemishes. Sometimes it will look great on the first try and others it will take some serious tweaking. The only effects that might be helpful here is "Hue/Saturation" to shift the hue slightly, "Tint" to force the color to match that which it is replacing, and then "Brightness/Contrast" to adjust any changes in light between the two samples. 

4. Hit Render and celebrate

That's it! You're done! Now, while it renders, go celebrate!

Hopefully this short and easy tutorial will help you when you've come into a jam and need to remove that pesky boom pole that keeps dropping in or when you are planning out your shots for an interview style video. One more thing, if you are needing to do this on a moving shot there is a solution. It involves camera tracking and attaching the composite layers (Clone tool and replications) to the track or some other more complicated methods. Here is an old tutorial that still works and here is another tutorial that looks very promising. We'd love to see your work if you end up using this method so feel free to post links below and ask questions! 

June 17, 2015 /Jake Taylor
2015, 1, After Effects, compositing, clone tool, easter, testimony, interview
Beginner, Creative, Post Production, Shooting, Video
3 Comments

How to Export Video from Premiere Pro CC // Beginner

March 10, 2015 by John David Wright in Beginner, Creative, Post Production, Video

Sometimes the most complicated part about learning to edit video is knowing what settings to use while exporting. What codec should I use? What container? Bitrate? Frame rate? In this post, I'm going to cover how we export video to play in our church services on Sunday mornings.

Read More
March 10, 2015 /John David Wright
video, video editing, premiere, premiere pro, adobe, export, exporting, 2015, 1
Beginner, Creative, Post Production, Video
4 Comments

We Are Hiring a Video Producer

February 24, 2015 by Creative Team in Creative, Post Production, Pre Production, Production, Shooting

The Creative Team at Highlands is in search of a video producer! This position is for the person who loves video. 

Read More
February 24, 2015 /Creative Team
2015, 1
Creative, Post Production, Pre Production, Production, Shooting
Comment

At The Movies - Special Effects with Construction Paper

February 02, 2015 by Jake Taylor in Post Production, Shooting, Video, Gear, Creative

Sometimes after we’ve filmed a video we realize we’ve missed something or we need one more shot to really tell the story. And sometimes that’s after a huge shoot with lots of moving pieces and scheduling, like horses, armor and a crazy location. So you cant really just pack everything up and head back out to shoot. Sometimes you have to fake a shot and sometimes all you have to use is construction paper.

Read More
February 02, 2015 /Jake Taylor
special effects, compositing, green screen, blue screen, 2015, 1
Post Production, Shooting, Video, Gear, Creative
1 Comment

New Year, New Blog

January 13, 2015 by Jake Taylor in Gear, Color, Post Production, Pre Production, Motion Graphics, Web Design, Video, Shooting, Production, Live Production, Graphic Design, Creative

We got a facelift! Thanks to squarespace. But don't worry all of our old content is still available here! 

Read More
January 13, 2015 /Jake Taylor
2015, 1
Gear, Color, Post Production, Pre Production, Motion Graphics, Web Design, Video, Shooting, Production, Live Production, Graphic Design, Creative
1 Comment
 

Email us at video@churchofthehighlands.com

© 2022 Church of the Highlands